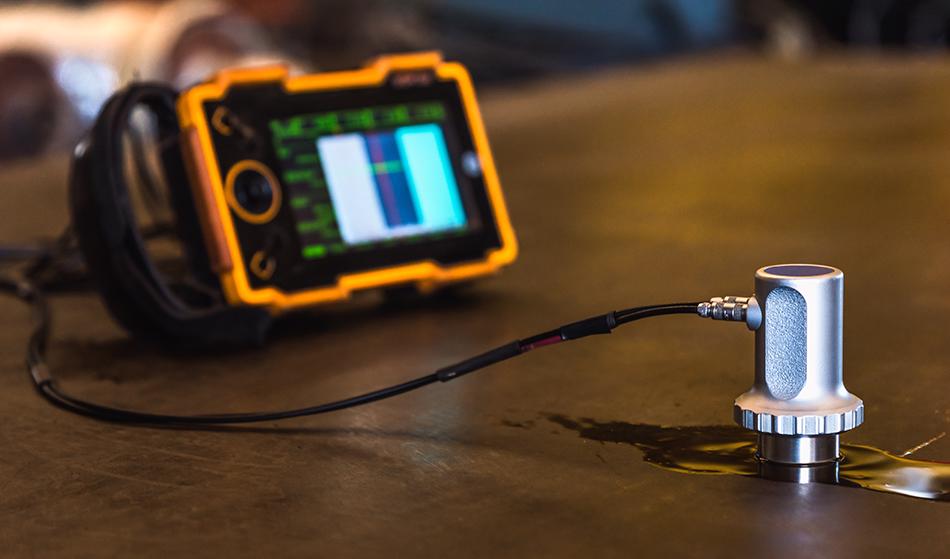
Ultrasonic testing is a non-destructive technique that is often performed on metals, alloys, wood, ceramics, concrete and composites. It has applications spanning welding to pipelines and is generally used to reveal whether a material has any structural flaws. In this article, we look at what ultrasonic testing is.
Ultrasonic testing is a method widely used to investigate whether a material has any flaws and to determine the thickness of a material. In many cases, measuring the thickness of a material enables the user to determine whether the material has any flaws, with one common example being a lower than expected thickness in pipelines, which indicates corrosion.

N_Sakarin/Shutterstock
Ultrasonic testing uses high-frequency ultrasonic waves that propagate through the material of interest. Once the ultrasonic waves have passed through the material they hit a “boundary” between the material and the space past the material (usually air) and reflect back to the source. This process enables the thickness to be determined by measuring the arrival time, expected distance and the intensity of the reflection.
In practice, an ultrasonic transducer is used to generate the ultrasonic waves. When the material of interest is scanned, the transducer is separated from the material by a thin layer of water or oil. This layer is required to transfer the ultrasonic wave to the material undergoing analysis and reduces the occurrence of noise. If a crack or any other structural flaw exists in the material, part of the energy will be reflected back and this is why both the intensity of the reflection and the arrival time of the ultrasonic waves are both required to analyze the sample.
The Different Methods
There are two different ways in which the ultrasonic waves are detected: reflection and attenuation. In reflection-based modes, the transducer acts as both the ultrasonic emitter and receiver. This is the method, as mentioned above, where the ultrasonic waves are reflected off any cracks in the material, or at the boundary between the material and the space beyond the material. In this case, the signal is outputted as a function of amplitude which represents the intensity of the reflection and the distance, and therefore the arrival time of the ultrasonic wave.
On the other hand, for the attenuation method, there is a separate transmitter and receiver located on opposite sides of the material. They are again separated from the surface of the material by a thin fluidic layer. This means that the waves are sent from the emitter, pass through the material and are received on the other side. Any cracks, defects or imperfections reduce the intensity of the ultrasonic wave, and this is picked up by the receiver which deduces their presence within the material.
Aside from these conventional methods, there is also a range of sub-methods that use the same (or similar) principles. These methods are often used in specific situations, such as in pressurized environments and within flooded pipes. Of these sub-methods, the most common include Advanced Ultrasonic Backscatter Technique (AUBT), Phased Array Ultrasonic Testing (PAUT), Long Range Ultrasonic Testing (LRUT), Internal Rotating Inspection System (IRIS), Time of Flight Diffraction (TOFD) and Dry-Coupled Ultrasonic Testing (DCUT).
Advantages and Disadvantages
One of the key advantages of ultrasonic testing is that it is non-destructive, which is particularly useful for pipelines as removal of sections is not necessary. Additionally, the process can detect flaws on and underneath the surface of a material, has high accuracy, reliability and penetrating power, requires access to only one side of the material, has no associated health hazards, is portable, and the output of results is immediate.
One of the main disadvantages is that the process can only be used on a limited number of materials. Additionally, a skilled and trained operator is required to perform the measurement because the instrument must be calibrated using appropriate reference standards to achieve correct results, and noise must be identified and eliminated from the results. Moreover, it is often hard to inspect areas which have a complex geometry, a rough surface or are extremely thin.
Sources and Further Reading
Disclaimer: The views expressed here are those of the author expressed in their private capacity and do not necessarily represent the views of AZoM.com Limited T/A AZoNetwork the owner and operator of this website. This disclaimer forms part of the Terms and conditions of use of this website.